24/7 Phone Services
- Mon-Sat: 09:00AM - 07:00 PM
- Email: abcassociatesstructures4u@gmail.com

-
-
Visit Our Place
Kingfishers’ 12 Marefield Road, Marlow, SL7 2QE
- Oct 12, 2026
- No Comments
- David Rowley
Common Mistakes When Repointing Brickwork: 17 Costly Errors to Avoid
The most common mistakes when repointing brickwork include using the wrong mortar mix, insufficient joint preparation, damaging bricks, poor mortar application and working in unsuitable weather. Using hard cement mortar on older brickwork can also cause moisture problems and cracking. Proper preparation, compatible mortar and correct curing help ensure durable, long-lasting repointing.
Repointing brickwork is an essential maintenance task that protects buildings against weather damage, moisture penetration and gradual deterioration. Although the process appears relatively straightforward, small mistakes during preparation, mortar selection or application can cause significant problems over time.
Across the UK, millions of homes feature traditional brick construction. Victorian terraces, Edwardian properties, Georgian townhouses and modern cavity wall buildings all rely on mortar joints to help maintain the performance of their external walls.
However, the materials and techniques suitable for one property may be entirely wrong for another. A modern cement-rich mortar that performs well on certain contemporary bricks could damage the softer, more porous brickwork found in older buildings.
Understanding common brickwork repointing mistakes is therefore important for homeowners, builders and property developers planning restoration or exterior maintenance.
This guide explores 17 common repointing errors, their consequences, the correct techniques for avoiding them, and additional considerations for traditional British buildings.
What Is Brickwork Repointing and Why Is It Important?
Brickwork repointing involves carefully removing deteriorated mortar from the joints between bricks and replacing it with fresh, compatible mortar.
Mortar gradually deteriorates through exposure to rain, frost, temperature fluctuations, building movement and general weathering. When joints become loose or excessively recessed, water may penetrate the masonry more easily.
Proper repointing helps to:
- Reduce excessive rainwater penetration through defective joints.
- Protect vulnerable brick edges from weather damage.
- Restore the appearance of external brickwork.
- Maintain the durability of masonry walls.
- Limit draughts entering through defective solid-wall construction.
- Preserve traditional architectural detailing.
- Reduce the likelihood of more extensive masonry repairs.
Nevertheless, not every old-looking mortar joint needs replacing. Mortar can remain functional despite some surface weathering.
The Society for the Protection of Ancient Buildings (SPAB) advises against unnecessary repointing, particularly where historic mortar remains sound.
17 Common Mistakes When Repointing Brickwork
1. Using the Wrong Mortar Mix
Choosing an incompatible mortar is one of the most damaging mistakes in brickwork restoration.
Mortar must be suitable for the brick’s strength, porosity and the way the wall was originally constructed.
Modern buildings commonly incorporate cement-based mortars, while many older British properties were constructed with lime-based mortars.
Using excessively strong cement mortar on soft historic brickwork can prevent moisture from evaporating readily through the joints. Water may instead remain within the bricks, increasing the risk of frost damage and surface deterioration.
How to avoid this mistake:
- Identify the existing mortar before selecting a replacement.
- Consider the building’s age, brick type and exposure conditions.
- Use a compatible lime-based mortar where appropriate for traditional masonry.
- Avoid choosing a stronger mortar simply because it appears more durable.
- Seek specialist mortar analysis for important or complex historic buildings.
The correct mortar should work with the bricks rather than behave as a rigid barrier around them.
2. Removing Too Little Old Mortar
Shallow mortar removal can prevent new pointing from forming a durable bond.
Applying fresh mortar over a thin layer of deteriorated material may initially improve the appearance of a wall, but the repair can quickly crack or become detached.
For conventional brick joints, guidance commonly recommends removing defective mortar to a depth of approximately two and a half times the joint width, where this can be achieved safely.
For example, a joint measuring 10 mm in width may require approximately 25 mm of preparation.
However, this should not be treated as permission to excavate sound historic mortar unnecessarily. The condition of the joint, construction type and structural stability must guide the work.
How to avoid this mistake:
Remove deteriorated mortar carefully until a suitable, sound backing is reached, following conservation guidance where applicable.
3. Removing Too Much Mortar or Damaging the Bricks
Excessive mortar removal is just as problematic as insufficient preparation.
Aggressive raking can damage the edges of bricks, sometimes called arises, and weaken fragile masonry.
Older handmade bricks are particularly vulnerable because their edges may already have deteriorated through decades of weather exposure.
Damage can include:
- Chipped brick corners.
- Enlarged or uneven joints.
- Cracked brick faces.
- Loss of historic mortar.
- Disturbance of loose masonry.
How to avoid this mistake:
Use appropriately sized hand tools wherever practical, particularly on heritage buildings. Remove material gradually and avoid applying unnecessary force.
If the joints are unusually narrow, fragile or deteriorated, consult a conservation specialist before proceeding.
4. Using Angle Grinders Incorrectly
Power tools can speed up mortar removal, but careless use may create permanent damage.
An angle grinder fitted with an unsuitable blade can cut into brick edges, widen joints and leave an uneven appearance.
Mechanical removal is especially risky on Victorian and Georgian brickwork where joints may be narrow and brick faces relatively soft.
It also creates substantial quantities of potentially hazardous silica-containing dust.
The UK Health and Safety Executive identify mortar raking as a high-risk dust-producing activity. Where mechanical tools are used, appropriate extraction, respiratory protection and other controls are necessary.
How to avoid this mistake:
Choose tools according to the masonry’s condition. On historic brickwork, hand removal is generally preferable unless a competent specialist has established that another method is safe.
Never prioritise speed over the preservation of the bricks.
5. Failing to Clean the Joints Properly
Loose dust, sand and mortar fragments can interfere with the bond between existing masonry and fresh mortar.
This mistake is particularly common when the removal stage is rushed.
Even a carefully selected mortar mix may perform poorly if it is packed against dusty, unstable surfaces.
How to avoid this mistake:
After raking out the joints:
- Remove loose material with a suitable stiff brush.
- Clear remaining debris from the joint.
- Inspect the backing mortar for stability.
- Dampen the joints appropriately before pointing.
- Avoid leaving standing water inside the joint.
Cleaning should be thorough but gentle enough to preserve vulnerable masonry.
6. Not Dampening the Brickwork Before Repointing
Dry, porous bricks can absorb moisture from fresh mortar too rapidly.
This is particularly important for older brickwork and lime-based mortars, which need suitable moisture conditions to develop strength.
If moisture is drawn away too quickly, the mortar may become weak, powdery or poorly bonded.
However, thoroughly soaking the wall immediately before pointing can cause different problems.
How to avoid this mistake:
Lightly dampen the prepared joints using an appropriate method, allowing the moisture to penetrate without leaving the surface saturated.
The amount of pre-wetting required depends on the brick’s absorbency, weather conditions and mortar type.
7. Adding Too Much Water to the Mortar Mix
Excessively wet mortar may seem easier to spread, but additional water can negatively affect its performance.
An over-wet mix is more likely to smear across brick faces, lose its intended consistency and suffer greater shrinkage during drying.
Different mortar systems require different working consistencies, so there is no single ideal water quantity for every project.
How to avoid this mistake:
Follow the mortar manufacturer’s instructions or an appropriately designed traditional mortar specification.
Add water gradually, use consistent measuring methods and mix only the quantity that can be applied within the material’s workable period.
Avoid attempting to revive mortar that has already begun setting by repeatedly adding water.
8. Choosing the Wrong Sand for Repointing
Sand influences mortar’s strength, texture, workability, colour and permeability.
Using unsuitable sand can produce inconsistent joints or a finish that looks noticeably different from the original masonry.
Very fine sand, poorly graded aggregates or materials containing harmful impurities may create performance problems.
Historic brickwork may also require particular aggregate sizes and colours to match the existing mortar.
How to avoid this mistake:
Select clean, appropriately graded sand suited to the chosen binder and joint width.
For conservation projects, examine the original mortar’s aggregate characteristics before selecting replacement materials.
A small trial mix can help determine whether the texture and colour are suitable.
9. Applying Mortar Without Compacting It Properly
Fresh mortar must be firmly packed into the prepared joint.
Simply spreading it across the front of a wall can leave hidden gaps and air pockets.
These defects may create pathways for moisture or result in sections of pointing separating from the original mortar behind them.
How to avoid this mistake:
Use a suitably sized pointing iron or other appropriate pointing tool to press mortar firmly into the joint.
Deep joints may require filling in layers, depending on the material and specification. Each layer should be properly compacted and allowed to firm as appropriate before the next is applied.
The objective is a complete, well-bonded repair rather than a superficial covering.
10. Overfilling the Joints and Smearing Mortar Over Bricks
Mortar should not be spread unnecessarily across the brick faces.
One common problem is overpainting, where the new mortar projects beyond the masonry surface or overlaps brick edges.
This can spoil the appearance of traditional brickwork and encourage moisture-related deterioration in vulnerable areas.
Mortar smears may also become difficult to remove once hardened.
How to avoid this mistake:
Keep mortar within the appropriate joint boundaries and finish it according to the existing brickwork and its exposure.
Remove accidental deposits carefully before they harden, using cleaning methods compatible with the masonry.
Avoid aggressive chemical cleaning, particularly on fragile historic bricks.
11. Choosing an Incorrect Pointing Profile
Common brickwork joint profiles
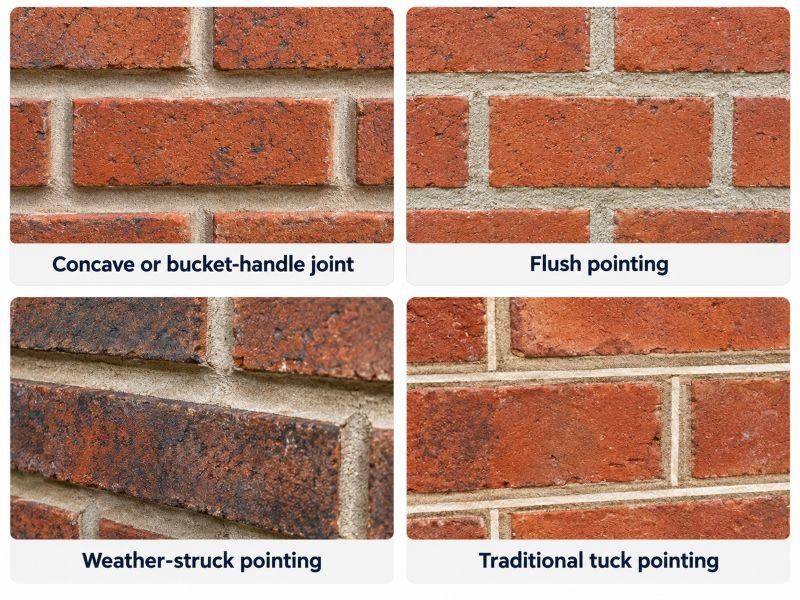
The shape of a mortar joint affects both the appearance and weather resistance of brickwork.
Common UK joint finishes include:
Joint type | Typical characteristics |
Flush pointing | Mortar finished approximately level with the brick face |
Bucket-handle pointing | Smooth concave profile commonly seen on modern domestic brickwork |
Weather-struck pointing | Sloping finish designed to direct rainwater away |
Recessed pointing | Mortar set back from the brick face, which can leave vulnerable edges exposed |
Tuck pointing | Decorative traditional finish creating the appearance of fine, regular joints |
There is no universally correct profile for every building.
For example, a strongly recessed finish may be unsuitable for exposed historic walls because it leaves more of the brick edge vulnerable to weathering.
How to avoid this mistake:
Consider the existing profile, the wall’s exposure and the building’s construction.
Historic England emphasises preserving appropriate traditional joint finishes when repointing heritage masonry.
12. Ignoring Weather Conditions
British weather can make repointing particularly challenging.
Rain, frost, direct sunlight and strong winds can all interfere with the application or curing of mortar.
Cold temperatures may prevent suitable strength development, while frost can damage fresh mortar before it has adequately cured.
Conversely, strong sun and drying winds may remove moisture too rapidly.
How to avoid this mistake:
Plan repointing during suitable weather and provide temporary protection when required.
Spring and early autumn often offer useful opportunities for external masonry work in the UK, although forecasts should always take priority over the season.
Check the mortar manufacturer’s temperature requirements and maintain suitable protection throughout the initial curing period.
13. Rushing the Curing Process
Repointing is not complete immediately after the mortar has been applied and shaped.
Fresh mortar needs suitable conditions to develop its intended properties.
This is particularly important with traditional lime-based mortars, some of which gain strength comparatively slowly.
Removing protection too early or allowing rapid drying may lead to weak and cracked joints.
How to avoid this mistake:
Follow the specific mortar’s curing requirements.
Lime mortar may need careful moisture management and protection over several days or longer, depending on the binder, temperature, wind and exposure.
Suitable breathable coverings and controlled dampening may be required.
Avoid assuming that a firm surface means the entire mortar joint has fully cured.
14. Failing to Match the Original Mortar Colour and Texture
A mismatched mortar finish can significantly alter the appearance of a brick building.
This problem is particularly noticeable on period terraces, decorative brick façades and properties with exposed feature brickwork.
Matching mortar involves more than selecting a similar colour while the mix is wet.
Sand colour, aggregate grading, binder type, finishing technique and curing conditions all affect the final appearance.
How to avoid this mistake:
Prepare a trial section before carrying out extensive work.
Allow the sample mortar to dry sufficiently before assessing its appearance.
Inspect the sample in natural daylight and consider how it blends with the surrounding brickwork.
For historically significant buildings, matching the original pointing style may be just as important as matching the colour.
15. Repointing Brickwork That Does Not Need Repair
One frequently overlooked mistake is removing perfectly serviceable mortar simply because it looks weathered.
This can cause unnecessary damage and increase restoration costs.
Historic mortar sometimes looks irregular or slightly recessed while continuing to perform adequately.
Removing it may destroy original craftsmanship and expose fragile bricks to avoidable damage.
How to avoid this mistake:
Inspect the wall before deciding how much repointing is necessary.
Consider localised repointing when deterioration affects only particular sections.
If the mortar remains well bonded and is not allowing excessive water penetration, wholesale replacement may be unnecessary.
Historic England recommends retaining sound historic mortar and focusing repairs on genuinely defective areas.
16. Ignoring the Original Cause of Damp or Cracking
Damaged pointing is sometimes a symptom of another building defect.
For example, a leaking gutter may repeatedly saturate a wall, causing mortar deterioration beneath the affected area.
Repointing without repairing the gutter is unlikely to provide a lasting solution.
Other underlying causes include:
- Defective roof flashings.
- Blocked or overflowing rainwater pipes.
- Cracked window surrounds.
- Movement around openings.
- Damaged coping stones.
- Persistent ground-level moisture.
- Structural movement or foundation problems.
How to avoid this mistake:
Identify why the mortar has deteriorated before beginning repairs.
Where cracks are widening, stepped or associated with distorted openings, arrange an appropriate structural assessment rather than treating the pointing alone.
17. Attempting Complex Repointing Without Suitable Experience
Small areas of straightforward modern brickwork may be manageable for experienced DIY enthusiasts.
However, large façades, exposed gable walls, chimneys and older properties require greater technical understanding.
Incorrect methods can produce damage that costs considerably more to repair than the original repointing work.
Working at height also introduces important safety requirements.
How to avoid this mistake:
Consider professional assistance when dealing with:
- Listed or historically significant buildings.
- High external walls and chimneys.
- Severely deteriorated brickwork.
- Unstable or cracked masonry.
- Specialist lime mortar systems.
- Complicated decorative pointing.
A competent contractor should explain the proposed mortar specification, preparation method, joint finish and curing arrangements before work begins.
Lime Mortar vs Cement Mortar: Which Is Better for Repointing?
One of the most important decisions when repointing brickwork is choosing a mortar that suits the building’s original construction.
Although both lime and cement mortars are widely used, they have different properties and are not interchangeable in every situation.
Feature | Lime Mortar | Cement-Based Mortar |
Common applications | Traditional and historic masonry | Many modern brick buildings |
Permeability | Generally, more vapour permeable | Often less permeable |
Flexibility | Accommodates some minor movement | Generally, more rigid |
Strength development | Can be relatively slow | Usually, faster |
Suitability for soft bricks | Often preferable | Strong mixes may cause damage |
Curing requirements | May require extended protection | Depends on mix and conditions |
Appearance | Suitable for many traditional finishes | Common in contemporary construction |
Main risk when incorrectly specified | Weakness or weathering | Trapped moisture and damaged masonry |
Choosing Mortar for Victorian and Edwardian Homes
Many Victorian and Edwardian houses were built using comparatively soft bricks and lime mortar.
These traditional solid walls manage moisture differently from modern cavity wall construction.
Where lime mortar is part of the original masonry system, replacing it with a dense, cement-rich mix can interfere with moisture movement.
For these properties, an appropriately specified lime mortar is commonly the safer choice.
However, building age alone does not establish the correct mortar specification. Existing materials, previous alterations and local exposure must also be considered.
Signs of Bad Repointing: How to Identify Poor Workmanship
Not every repointing defect becomes apparent immediately. Some problems develop gradually as mortar is exposed to rain, frost and temperature changes.
Homeowners should inspect repaired brickwork for visible indications of poor workmanship.
Warning sign | Possible problem | Recommended action |
Mortar cracking shortly after application | Rapid drying, shrinkage or poor bonding | Investigate the mortar and curing conditions |
Mortar falling out of joints | Insufficient preparation or compaction | Remove failed material and repair properly |
White deposits on brickwork | Salt movement or efflorescence | Investigate moisture sources before cleaning |
Brick faces breaking away | Possible trapped moisture and frost damage | Assess mortar compatibility and brick condition |
Uneven joint profiles | Inconsistent application or tooling | Inspect workmanship and agree remedial work |
Mortar smeared across bricks | Poor finishing technique | Use suitable, non-damaging cleaning methods |
Persistent damp patches | Continuing water ingress or another moisture defect | Investigate the building’s moisture pathways |
Excessively wide joints | Possible damage during mortar removal | Assess brick edges and masonry condition |
How Long Does It Take for Bad Pointing to Become Noticeable?
Some defects become visible within days, particularly shrinkage cracking, colour inconsistencies and mortar staining.
Other problems may not appear until the brickwork has experienced several periods of wet and cold weather.
For example, inappropriate cement pointing on soft bricks may gradually contribute to moisture retention and frost-related surface damage.
This is why a freshly repointed wall should not be judged entirely by its immediate appearance.
Correct Brickwork Repointing Process: Step-by-Step Guide
Understanding the correct sequence makes it easier to identify mistakes before they become expensive repairs.
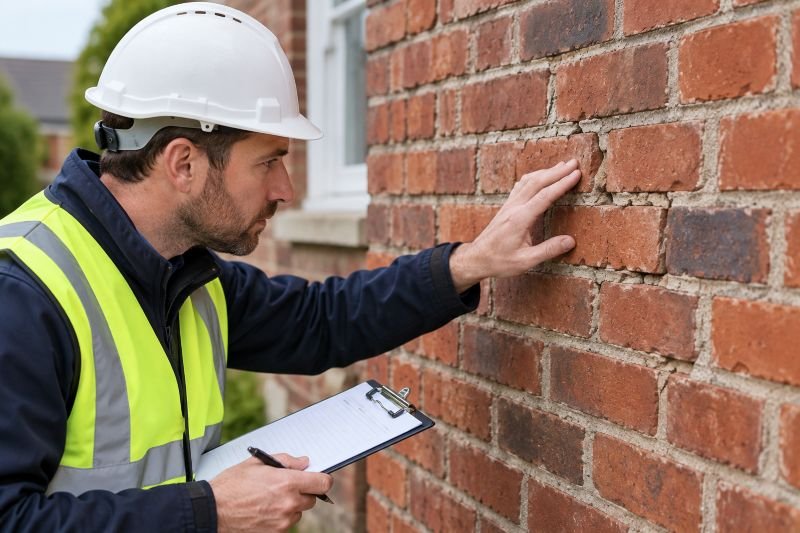
Step 1: Inspect the masonry
Examine the condition of the existing joints, identify damaged bricks and check for cracks, moisture problems or structural movement.
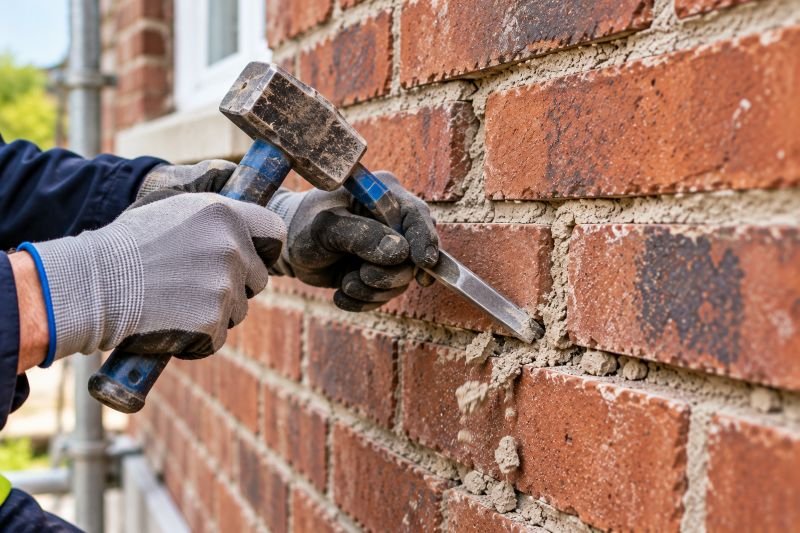
Step 2: Remove defective mortar
Carefully rake out deteriorated mortar to an appropriate depth without cutting into the surrounding brickwork. Clear away loose debris.
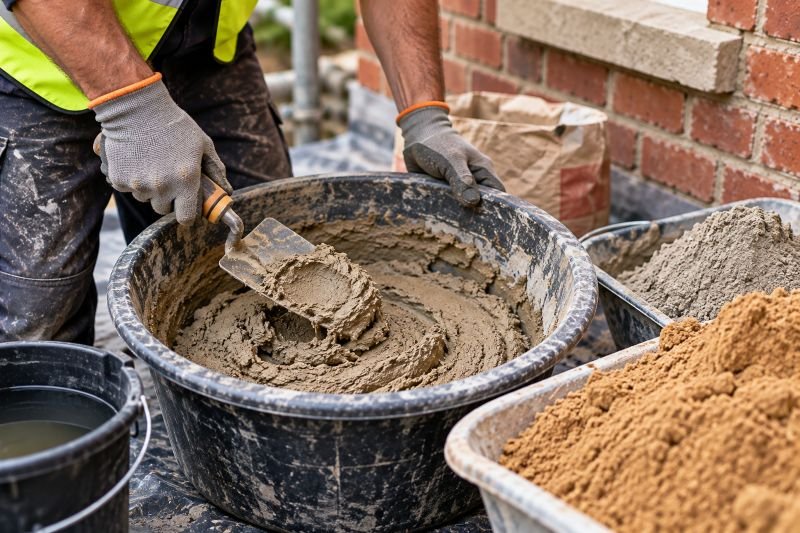
Step 3: Prepare the correct mortar
Choose a compatible mortar formulation and suitable sand. Maintain a consistent mix and prepare only workable quantities.
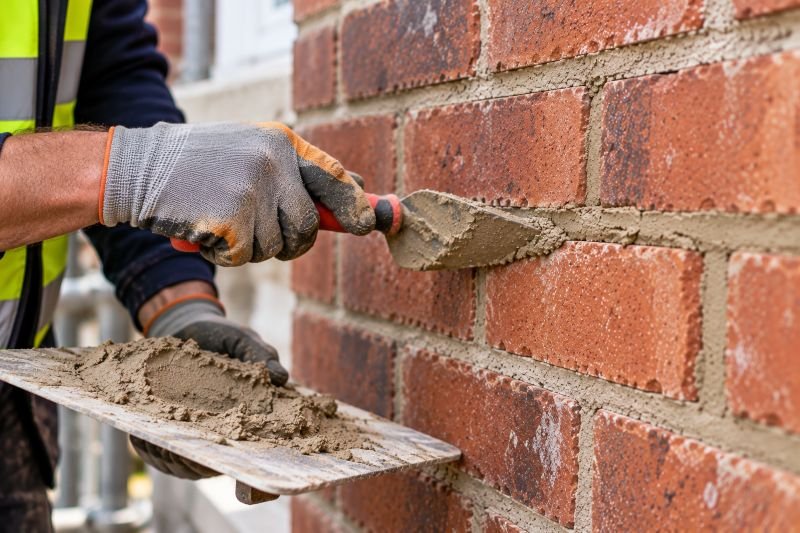
Step 4: Fill the joints
Dampen the prepared masonry as appropriate, then press the mortar firmly into the joints without leaving gaps or cavities.
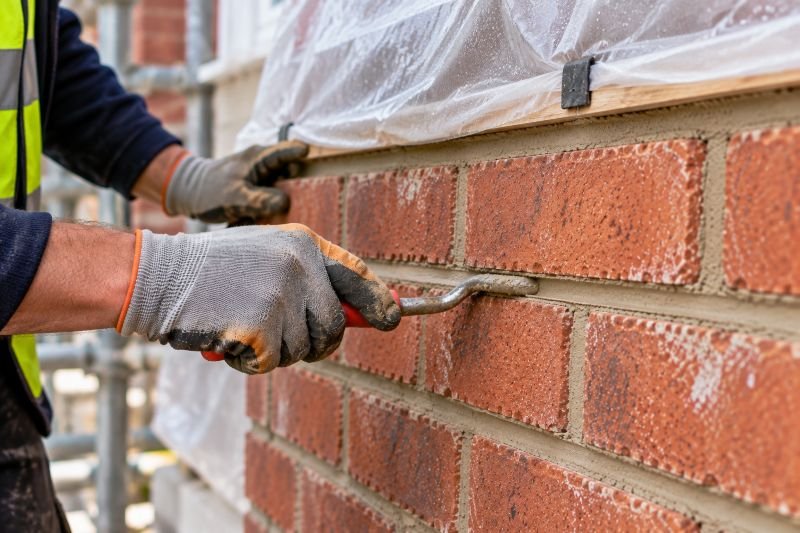
Step 5: Finish and protect the pointing
Form the specified joint profile at the appropriate stage. Protect the repair from rain, frost, wind and excessively rapid drying while it cures.
Additional Mistakes Specific to Older UK Properties
Traditional buildings require particular attention because their materials and construction methods can differ substantially from modern masonry.
Ignoring Conservation and Listed Building Requirements
Repointing work on a listed building may require listed building consent if the proposed changes affect its special architectural or historic interest.
For example, using a different pointing profile, introducing incompatible mortar or mechanically removing historic joints may have conservation implications.
Not every like-for-like repair automatically requires consent, but this should be checked before work begins.
Conservation areas may also have additional planning considerations depending on the property, its location and the proposed work.
Owners should consult their local planning authority and, where appropriate, a conservation specialist.
Removing Hard Cement Pointing Without Assessing the Bricks
If a historic building has previously been repointed using hard cement mortar, removing it may seem the obvious solution.
However, cutting out strongly bonded cement can cause substantial damage to fragile brick edges.
In some cases, leaving the existing pointing temporarily undisturbed may cause less harm than aggressive removal.
A specialist should assess whether removal can be carried out safely and whether trial repairs are appropriate.
Using Waterproof Coatings to Conceal Mortar Problems
Applying an impermeable coating over defective brickwork may hide deterioration without addressing its cause.
This is particularly problematic for traditional solid walls that rely on moisture being able to evaporate through the masonry.
Before considering any water-repellent treatment, identify the source of moisture and assess the wall’s construction.
Repointing should form part of an appropriate repair strategy rather than be combined automatically with surface sealants.
Forgetting About Previous Repairs and Alterations
Older British properties may have undergone numerous alterations over their lifetime.
An external wall might contain original lime mortar, later cement repairs, replacement bricks and modern extensions within the same elevation.
Applying one mortar specification indiscriminately may not be suitable.
Assess separate construction phases and establish which existing materials are appropriate to retain.
How Much Does Brickwork Repointing Cost in the UK?
The cost of repointing depends on the wall area, mortar specification, access arrangements, preparation requirements and building condition.
According to Checkatrade’s 2026 UK cost guide, standard brickwork repointing is typically around £50 to £60 per square metre, although extra preparation, scaffolding and specialist restoration can significantly increase the price.
These are indicative market figures, not fixed quotations.
A small repair to an accessible garden wall may be relatively inexpensive, while repointing the entire façade of a Victorian terrace can involve substantial scaffolding and specialist labour.
Factors That Increase Repointing Costs
- Extensive removal of hard or defective mortar.
- Difficult access or working at height.
- Fragile handmade bricks requiring careful preparation.
- Specialist lime mortar and traditional pointing finishes.
- Additional repairs to damaged bricks or masonry.
- Weather-related protection and extended curing periods.
- Conservation requirements and specialist assessments.
Choosing the cheapest quotation without checking the specification can be a false economy.
A more useful comparison examines the proposed mortar, removal method, joint finish, access arrangements and whether remedial brickwork is included.
How to Choose a Reliable Brickwork Repointing Contractor
Hiring a skilled contractor can reduce the risk of damage and premature repair failure.
However, it is important to distinguish between general bricklaying experience and specialist knowledge of traditional building conservation.
Before agreeing to a project, ask the contractor to explain the proposed approach.
A reliable contractor should be able to discuss the existing brickwork, mortar compatibility and the preparation work required.
They should also be prepared to explain how they intend to protect vulnerable masonry and manage weather conditions during the project.
For significant work, request a written quotation that clearly identifies the scope, materials, access arrangements and any exclusions.
For historic properties, examples of comparable previous restoration projects can be particularly valuable.
Practical Repointing Checklist for UK Homeowners
- Inspect the existing mortar and brick condition
- Investigate leaks, damp and structural cracks
- Confirm the appropriate mortar type
- Agree the mortar removal method and depth
- Prepare a trial panel for colour and finish
- Check weather conditions and curing protection
- Confirm safe access and dust-control arrangements
- Inspect finished joints for gaps and smearing
- Arrange appropriate aftercare and final inspection
Conclusion
Avoiding common mistakes when repointing brickwork requires more than selecting a suitable mortar and filling visible gaps. Long-lasting results depend on accurate assessment, careful mortar removal, appropriate materials, effective application and controlled curing.
This is especially important in the UK, where frequent rainfall, cold weather and the widespread presence of traditional brick buildings can make unsuitable repairs particularly damaging.
Homeowners should remember that stronger mortar does not automatically provide better protection. A compatible mortar, carefully applied to properly prepared joints, is generally far more valuable than a hard or visually perfect finish that performs poorly with the existing masonry.
Where brickwork deterioration is accompanied by significant cracking, movement or uncertainty about the wall’s structural condition, professional assessment is important. ABC Associates Structures4u can be considered for appropriate structural advice before extensive masonry repairs are undertaken.
By understanding common repointing errors and addressing their underlying causes, property owners can protect the appearance, durability and long-term performance of their brickwork.
FAQS
Frequently Asked Questions
What Is the Most Common Mistake When Repointing Brickwork?
The most common mistake is using an incompatible mortar mix, particularly hard cement mortar on older, softer brickwork originally constructed with lime mortar. This can interfere with moisture evaporation and contribute to brick deterioration. Correct mortar selection should account for the building’s materials, construction and exposure.
How Deep Should You Rake Out Mortar Before Repointing?
For conventional brick joints, a preparation depth of approximately two to two and a half times the joint width is commonly recommended. A 10 mm joint may therefore require roughly 20 to 25 mm of removal. The appropriate depth depends on mortar condition and masonry stability, and sound historic material should not be removed unnecessarily.
Can Repointing Damage Bricks?
Yes. Incorrect repointing can damage bricks through aggressive mortar removal, incompatible cement mortar, poor moisture management or unsuitable joint finishes. Historic and soft bricks are particularly vulnerable to chipped edges, cracking and frost-related deterioration when inappropriate methods are used.
Can Repointing Damage Bricks?
Repointing is possible during winter when suitable temperatures and protective measures can be maintained. However, fresh mortar must be protected from frost, excessive rain and rapid drying. The mortar manufacturer’s requirements and prevailing site conditions should determine whether work can proceed safely.
Why Is My New Repointing Cracking?
New pointing may crack because of excessive water in the mortar, rapid drying, poor joint preparation, incorrect mortar strength or insufficient curing protection. Some cracks may also result from building movement. The type and extent of cracking should be assessed before attempting repairs.
How Long Should Brickwork Repointing Last?
Well-executed repointing can last for several decades, depending on the mortar type, brick condition, exposure, workmanship and ongoing maintenance. Exposed chimneys and weather-facing elevations may require attention sooner than sheltered areas. Regular inspections help identify deterioration before extensive repairs become necessary.
Is It Better to Repoint or Replace Damaged Bricks?
Repointing is appropriate when the mortar joints are defective but the bricks remain serviceable. If bricks are severely cracked, spalling, loose or structurally compromised, replacement or additional masonry repairs may be necessary. The cause of the damage should be investigated before deciding on the most suitable treatment.
Recent Comments
No comments to show.
Leave A Comment